Handprint Pot

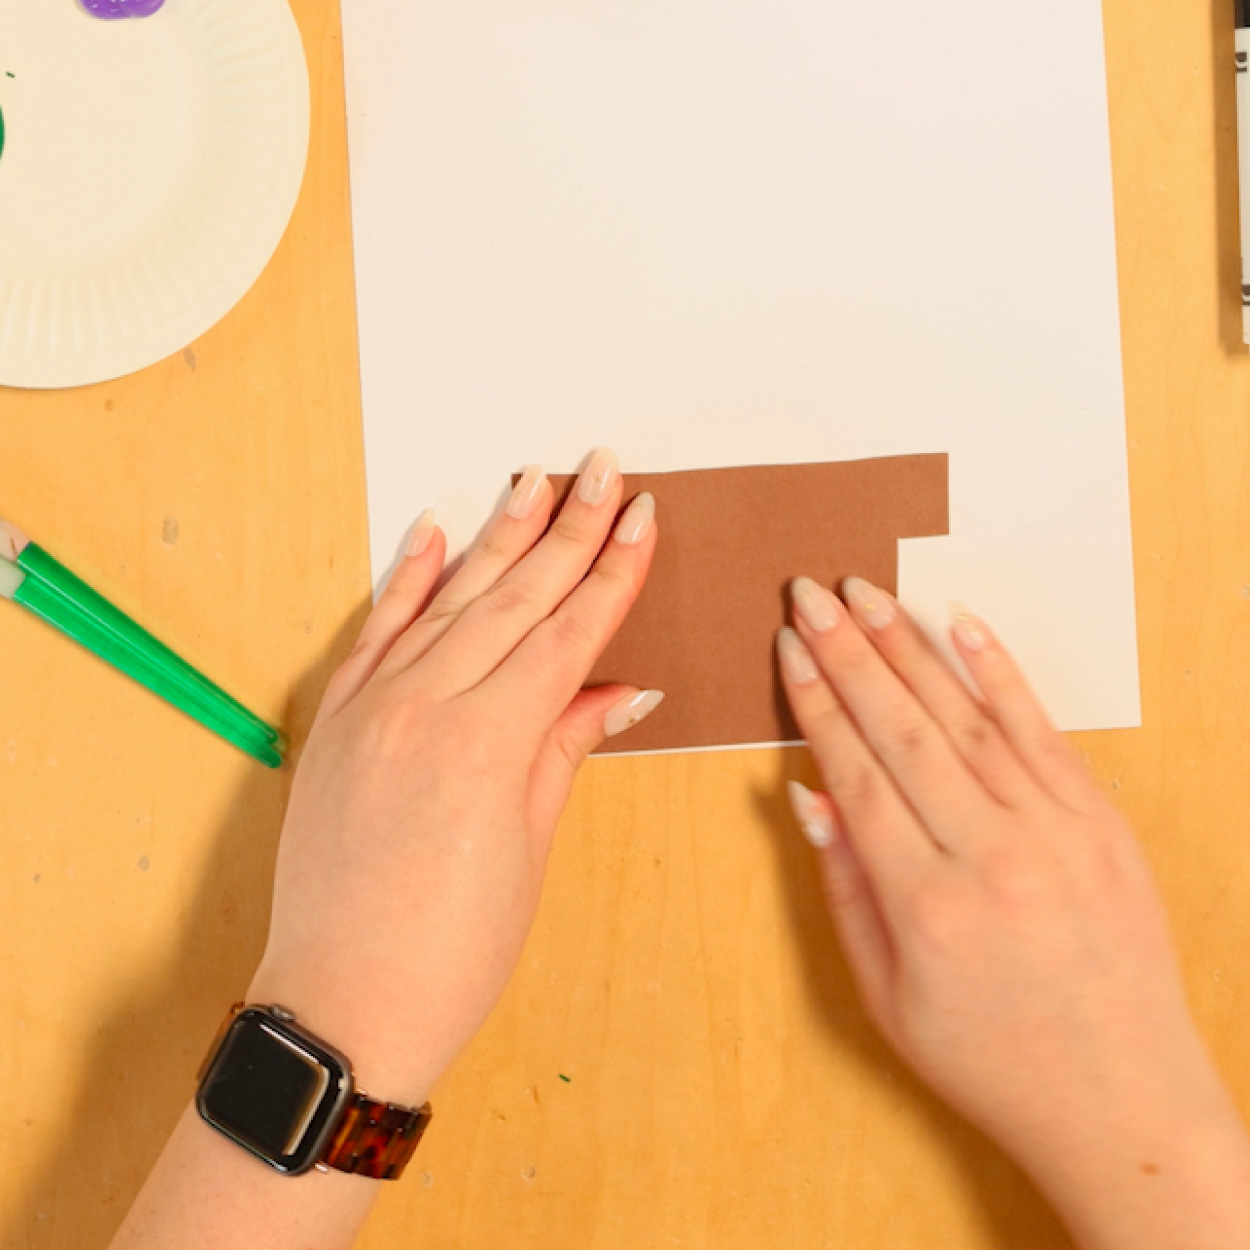
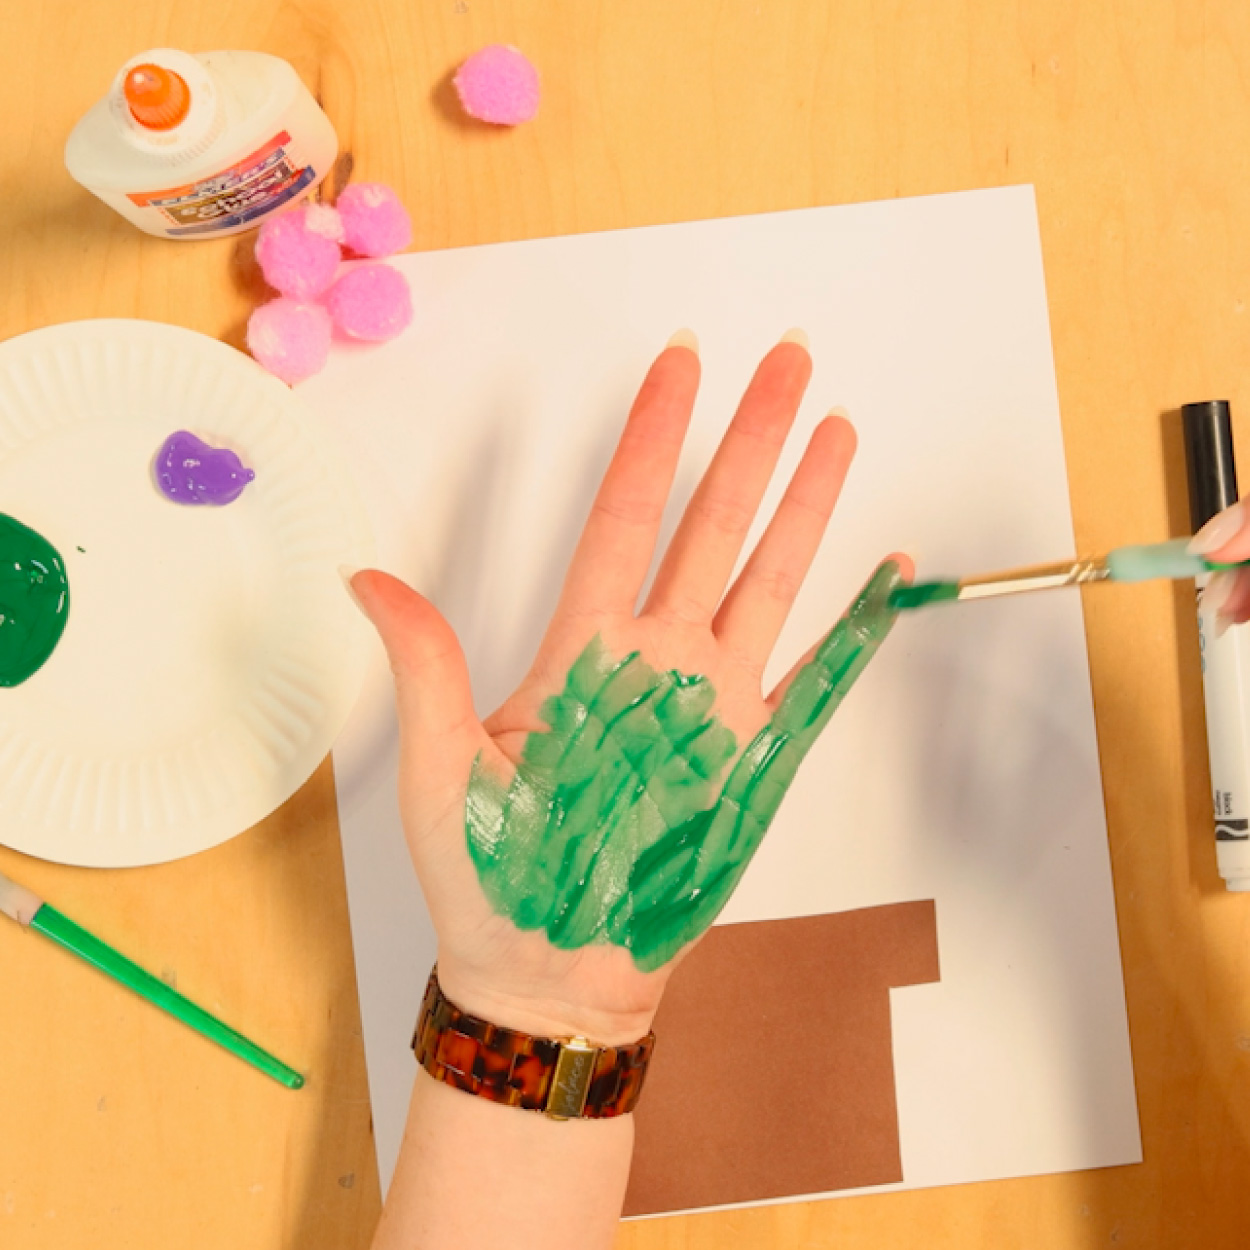
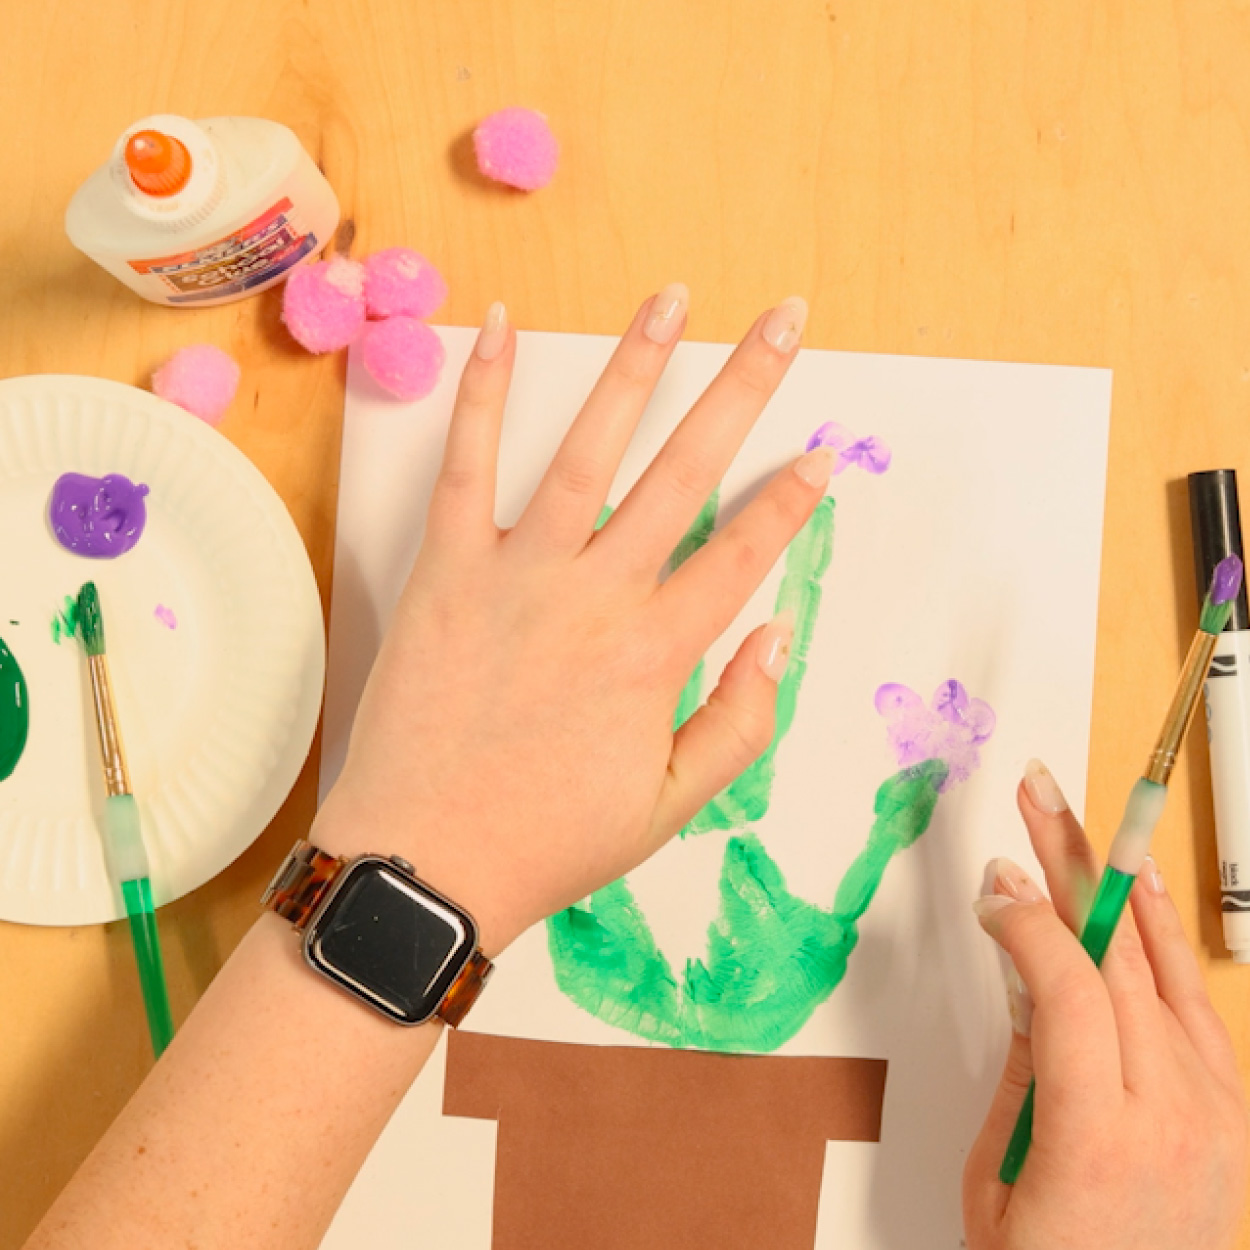
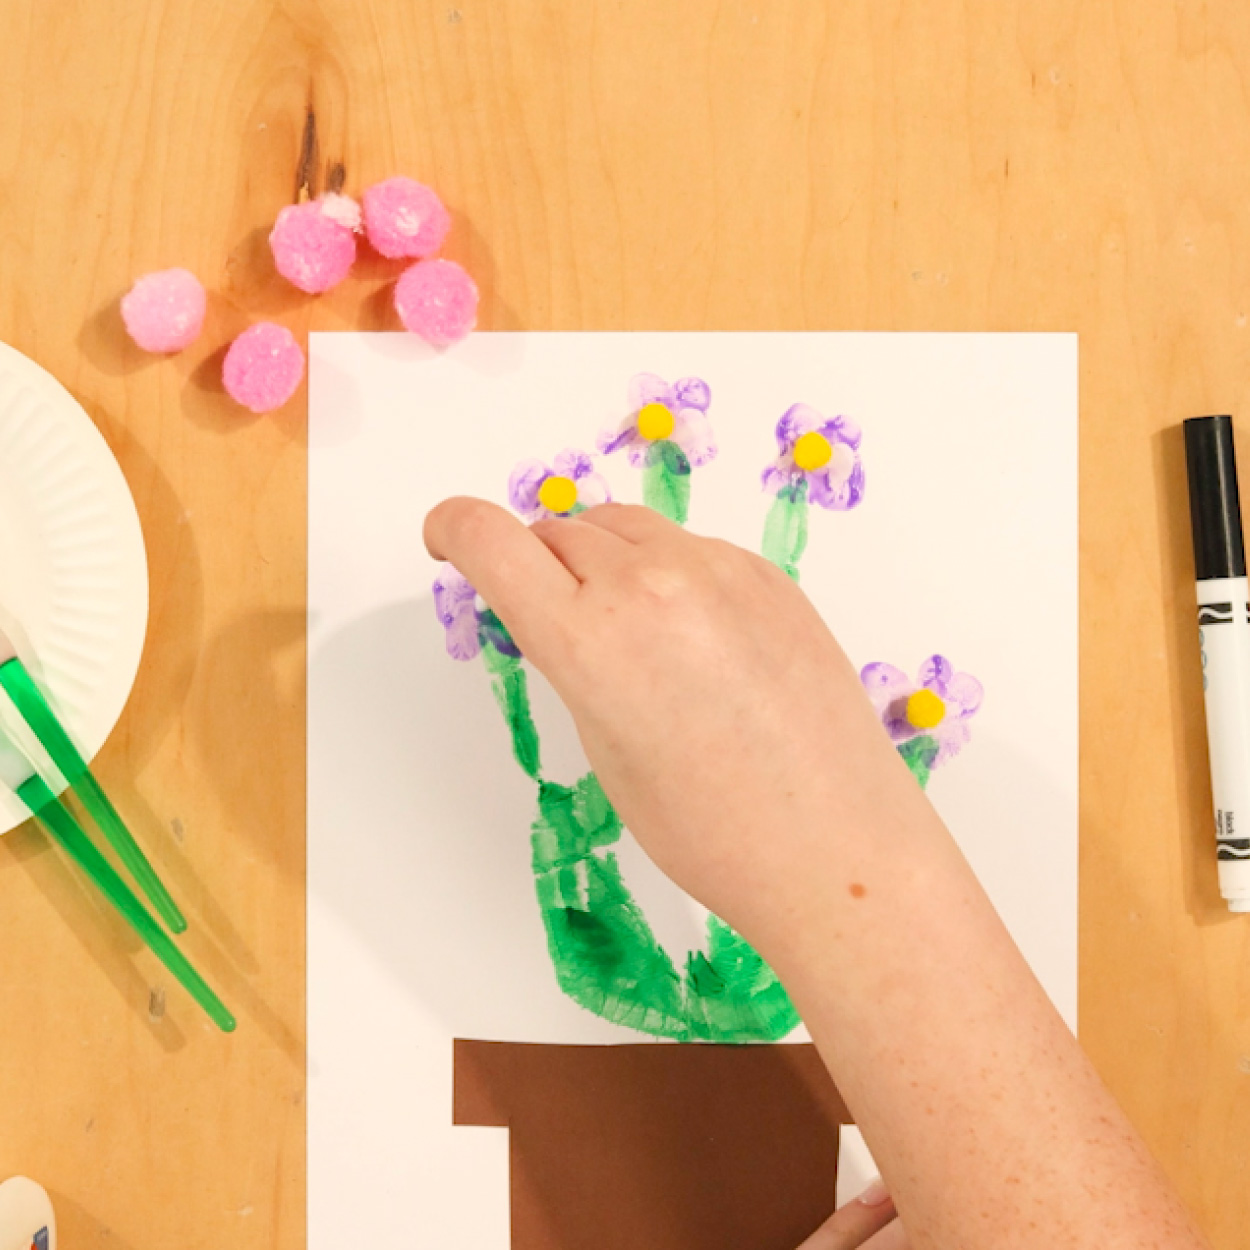
STREAM Activity: Handprint Pot

Happy Mother’s Day!

Activity best for children ages three and up

Today we celebrate the grownup in our life that we call Mom. One of the best ways we can show how much we love them is to make something sweet for them! Today we are going to make a potted flower using our handprints to give to our mom or caregiver to let them know how special we think they are!

VOCABULARY

  • Mom: A grown-up who takes care of you, keeps you safe, and helps you learn new things!

  • Flower: The colorful part of a plant that has many petals and smells nice!

GUIDING QUESTIONS

  • What do you like about your mom?

  • Do you think your handprint would look the same or different when you get older?

MATERIALS

  • Non-Toxic Paint (Green & Your mom’s favorite colors for the flowers!)

  • Paintbrush or Sponge Brush

  • 1 Paper Plate or Paint Tray

  • White Glue/ Liquid Glue

  • 5 Pompoms (any color)

  • 1 Sheet White Cardstock

  • 1 Sheet Brown Construction Paper

  • Glue Stick

  • Scissors

  • Markers or Crayons

  • * Make sure to have access to a sink, baby wipes, or a wet paper towel to wash your hands between paint colors!

DIRECTIONS

STEP 1

First, take your brown sheet of construction/cardstock paper and, using your scissors, cut out a flower pot shape.

Draw a flower pot shape

STEP 2

Glue your flowerpot to the bottom of your white cardstock. Feel free to color your flowerpot, or write a sweet message for your Mom!

Glue flower pot to paper

STEP 3

Using your paintbrush or sponge, paint your whole hand green and place it on your white cardstock just above the top of the flowerpot. Your hand is the stem of your flower, helping to make your flower strong!

Paint your hand green

STEP 4

After cleaning off the green paint, dip your fingertips into a different color paint and make small dots around the top of each of your fingers on the white cardstock. These dots you are making are your flower petals!

Paint your fingertips for petals

STEP 5

Allow a few moments for all of your paint to dry. Then place a dot of wet glue in the center of each of your flowers. Now, take a small pom pom and place it on top of each glue dot. This is the middle of your flower where the pollen sits!

Add yellow pom pom centers

STEP 6

Now your flower is complete! If you want, now is a great time to decorate the rest of your page using markers or crayons! Once you are done, give it to your Mom to let her know how special she is to you!

Handprint Pot